complexity of xixibook
goals and example files
the issue
I have scanned a lot of picutures/photos (totally around 800), the complexities here are :
- when I scan them, I set different DPIs , sometime 200
- sometime I scan with input size A3 (for large pictures) , or A4
- I also have some other pictures that was taken by camrols.
the goals
I want to re-format ALL of my pictures, and:
- make sure they can be printed to exactly (or at least roughly) the same physical size (A4),
- while at the same time, for bigger images only, don't lose resolutions
- for smaller image, I don't mind if they are expanded and thus lose some resolutions
so the whole purpose is, later on I can merge them into a a pdf book with each
page has the same size, and thus to print hardcopies.
it's easy for IM to convert between different format, resize, sample, and so
on... but whenever I resize a large picture to smaller size, it looks not as
clear as the orignal ones, I guess I lost the resolutoin here.
example photos:
2330996 May 20 20:35 a2-IMG_1626-1024x768-rotate90-density.pdf
 335121 May  9 16:27 a2-IMG_1626-1024x768-rotate90.pdf
 104206 May  9 18:22 a4-biru.pdf
  19542 May  9 17:40 b1-prefix_1.pdf
 165018 May  3 15:16 c-pg_0113.pdf
 235590 May  3 15:16 f-pg_0673.pdf
discussions/consulations
http://www.imagemagick.org/discourse-server/viewtopic.php?f=1&t=23452
some basic knowledge
A4 paper pixel size or [physical size]
PDF "DPI" don't have a DPI
paper size/density/dimension/pixel/DPI/etc
from fmw42:
pixel dimensions don't equate to printed size. The latter depends upon the pixel dimensions and the density.
So to keep the printed size the same you need to make sure that when you combine the pixel dimension with the density (resolution in inches or centimeters) so that it matches the physical printed size of the A4.
According to http://www.imagemagick.org/script/comma ... s.php#page, A4 has a pixel dimension of 595x842 presumably at 72 dpi.
Thus if you divide pixels dimensions x 72dpi you get 8.26 inches by 11.69 inches. That seems to closely match https://en.wikipedia.org/wiki/Paper_size which say 8.27 × 11.69
So what you want to do is find the image size (without resizing) and compute what density you need to achieve these printed sizes in inches. Then just set the density of the images.
convert image -density XX -units pixelsperinch result
To keep aspect ratio, you should not have -density XXxYY with different XX and YY. So you may need to either crop or pad your image appropriately.
If you want smaller pixel dimensions than in your original image, you can resize and then do the same computations, but if you get too small pixel dimension, then you will lose quality and image will look blocky.
Alternately, you can resize your images (cropping or padding) so that you can use a nominal density (say 150 or 300) for printing. So you have to work it the other way -- for the given density figure out what the pixel dimensions will need to be to achieve the given 8.26 inches by 11.69 inches
Avoid using ImageMagick for 'Vector Image' to 'Vector Image' conversions
Their is more than one style of image storage in the world...
Raster
Images which are stored and processed using arrays of colored pixels. Raster image formats includeGIF,
- PNG,
- JPEG,
- TIFF,
- and so on.
Images can consist of multiple arrays (channels) representing different colors, and can have multiple images, layers, or frames (depending on usage) in the one image file format file.
Vector
Images are defined in terms of lines, thicknesses, tiles, gradients, and larger compound objects. Formats includeSVG,
- Postscript,
- PDF, <------
- FIG,
- DXF,
- WMF, and even
- TTF fonts.
It allows images to be resized, and even greatly enlarged without loss of quality. Also while editing such formats, you can generally move whole objects around without destroying what is underneath (object layering).
- Fractal
Images are a special rare case, used to achieve extreme compression of complex images, such as old paintings. However the only usage I know about is in a very expensive commercial product. Outside that usage it is also used for complex mathematical objects such as Mandelbrot and Julia sets, and in generating randomized splashes of color in screen savers (IFS). It is very rarely seen. ...... Avoid using ImageMagick for 'Vector Image' to 'Vector Image' conversions EG: converting between formats like: PDF, PS, SVG
better scan in jpg/tif
--from fmw42
Scanning to a pdf is not advised if you want to do any post processing. You should be able to select other formats besides pdf. Typically there should be jpg and/or tif.
The pdf will probably say 72 dpi, because that is the vector wrapper. You would need to use some other tool to extract the image from the vector wrapper. That is also why it is not advised to scan to pdf.
If you must save a result as PDF, then it should be the last step.
pdfimage
solutions
based on this facts and consultations, the solutions are:
- extract images out of pdf , proceed based on it
- put them into OOO and resize manually, then print as pdf; or
-
use IM to script
-
ignore the file size/internal algorithm hell, just force IM to handle the pdf the same way as other image formats.
some tests
density testing results
convert a2-IMG_1626-1024x768-rotate90.pdf -density 93x88 a2-IMG_1626-1024x768-rotate90-density.pdf
generates this new pdf photo
the density is (wrongly) displayed as 72x72 forever
$ identify -format "%x x %y" a2-IMG_1626-1024x768-rotate90-density.pdf
72 Undefined x 72 Undefined

$ identify a2-IMG_1626-1024x768-rotate90-density.pdf
a2-IMG_1626-1024x768-rotate90-density.pdf PDF 595x838 595x838+0+0 16-bit Bilevel DirectClass 62.9KB 0.010u 0:00.010
$ identify a2-IMG_1626-1024x768-rotate90.pdf
a2-IMG_1626-1024x768-rotate90.pdf PDF 768x1024 768x1024+0+0 16-bit Bilevel DirectClass 98.4KB 0.000u 0:00.000
So basically the result is: it's been shrunk (to an A4 paper size) as expected, good still looks clear * file size grows much bigger (7 times!), this is not good
2330996 May 20 20:35 a2-IMG_1626-1024x768-rotate90-density.pdf
 335121 May  9 16:27 a2-IMG_1626-1024x768-rotate90.pdf
converting pdf to other format:pdfimage vs. convert
$ pdfimages -j a2-IMG_1626-1024x768-rotate90.pdf test

$ convert a2-IMG_1626-1024x768-rotate90.pdf test2.jpg

$ identify test-000.jpg
test-000.jpg JPEG 768x1024 768x1024+0+0 8-bit DirectClass 327KB 0.000u 0:00.000

$ identify test2.jpg
test2.jpg JPEG 768x1024 768x1024+0+0 8-bit DirectClass 227KB 0.000u 0:00.000

$ identify -format "%x x %y" test-000.jpg
72 PixelsPerInch x 72 PixelsPerInch

$ identify -format "%x x %y" test2.jpg
72 PixelsPerInch x 72 PixelsPerInch
generated files:
327239 May 21 17:13 test-000.jpg
226809 May 21 17:17 test2.jpg
- a2-IMG_1626-1024x768-rotate90.pdf(original)
- test-000.jpg by pdfimage
- test2.jpg by convert
- visually, at least for me, there are no much difference
another test of pdfimage
for this file c-pg_0113.pdf(original)
$ identify c-pg_0113.pdf
   **** Warning: considering '0000000000 XXXXX n' as a free entry.

   **** This file had errors that were repaired or ignored.
   **** The file was produced by:
   **** >>>> itext-paulo-155 (itextpdf.sf.net-lowagie.com) <<<<
   **** Please notify the author of the software that produced this
   **** file that it does not conform to Adobe's published PDF
   **** specification.

c-pg_0113.pdf PDF 612x792 612x792+0+0 16-bit Bilevel DirectClass 61KB 0.000u 0:00.000

$ pdfimages -j c-pg_0113.pdf c-pg_0113-pdfimage
Error (425): Command token too long

$ convert c-pg_0113.pdf -density 74x68 c-pg_0113-density74x68.jpg
   **** Warning: considering '0000000000 XXXXX n' as a free entry.

   **** This file had errors that were repaired or ignored.
   **** The file was produced by:
   **** >>>> itext-paulo-155 (itextpdf.sf.net-lowagie.com) <<<<
   **** Please notify the author of the software that produced this
   **** file that it does not conform to Adobe's published PDF
   **** specification.

$ identify c-pg_0113-density74x68.jpg
c-pg_0113.jpg JPEG 612x792 612x792+0+0 8-bit DirectClass 104KB 0.000u 0:00.000

$ identify -format "%x x %y" c-pg_0113-density74x68.jpg
74 PixelsPerInch x 68 PixelsPerInch
generated files:
$ ls -l
total 12704
 131928 May 21 17:32 c-pg_0113-pdfimage-000.jpg
6323873 May 21 17:20 c-pg_0113-pdfimage-000.ppm
1053989 May 21 17:32 c-pg_0113-pdfimage-001.pbm
1053989 May 21 17:32 c-pg_0113-pdfimage-002.pbm
1053989 May 21 17:32 c-pg_0113-pdfimage-003.pbm
1053989 May 21 17:32 c-pg_0113-pdfimage-004.pbm
  37708 May 21 17:32 c-pg_0113-pdfimage-005.pbm
1053989 May 21 17:32 c-pg_0113-pdfimage-006.pbm
 159420 May 21 17:32 c-pg_0113-pdfimage-007.pbm
1053989 May 21 17:32 c-pg_0113-pdfimage-008.pbm
103740 May 21 20:09 c-pg_0113-density74x68.jpg
- c-pg_0113.pdf(original)
- c-pg_0113-density74x68.jpg(via IM)
- c-pg_0113-pdfimage-000.jpg(via pdfimage
- c-pg_0113-pdfimage-000.ppm
- c-pg_0113-pdfimage-001.pbm
- c-pg_0113-pdfimage-002.pbm
- c-pg_0113-pdfimage-003.pbm
- c-pg_0113-pdfimage-004.pbm
- c-pg_0113-pdfimage-005.pbm
- c-pg_0113-pdfimage-006.pbm
- c-pg_0113-pdfimage-007.pbm
- c-pg_0113-pdfimage-008.pbm
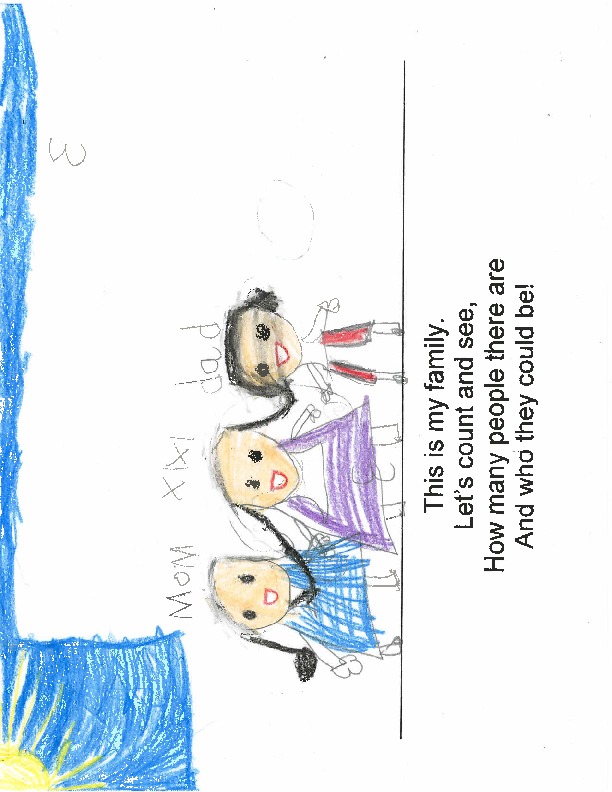
the interesting thing is, if you look at the jpg file that pdfimage extracted
from the original pdf, some parts of the drawing are missing... and they are put
in other ppm files.
My guess, based on the reading, is that the original drawing, when be scanned by
the printer, my printer happened to recognized some part of the drawing and
match them into some kinds of vector objects and hence stored in a different
format as a seperated objects, in the same PDF picture. that's why pdfimage
extract them into different files?
other convert tools
to be tested (pstoedit,pstopnm,etc).
final solution: montage composition within a script
scripting image process
To simply the work, I wrote this small shell script to do the image processing work in batch mode.
the lines that do the hardest work are :
   ...<snipped>...
   montage $picture1 $picture2 -geometry '612x792+1+1>' -frame 5 -set label '%f' -title "xixi's arts" $montage_dir/$montagefile_prefix-$pair.pdf
   ...<snipped>...
   pdftk $montage_dir/* cat output $montage_dir/$montage_dir-all-in-one.pdf
   ...<snipped>...
blog comments powered by Disqus